






DIY Golf Simulator Enclosure with Premium Impact Screen
DIY Series 10x8 Golf Simulator Enclosure
The Elite Sim Golf DIY Series 10x8 is the foundation for your custom golf simulator — a premium enclosure platform built for golfers who want a cleaner, more professional setup with the flexibility to build it their way. If you’re shopping for a DIY golf simulator enclosure or Do-It-Yourself golf enclosure kit, the DIY Series gives you a more premium starting point with fully customizable options to match your room, goals, and budget.
- Large 10' wide x 8' tall hitting bay format
- Fully customizable build path for your simulator space
- Premium triple-layer impact screen included standard
- Bungee cord bottom for seamless transition from screen to turf
- Optional High-Contrast Gray Premium Golf Screen available
- Works with standard 1" EMT conduit sourced locally or pre-cut framing options
- US-based support from real simulator specialists
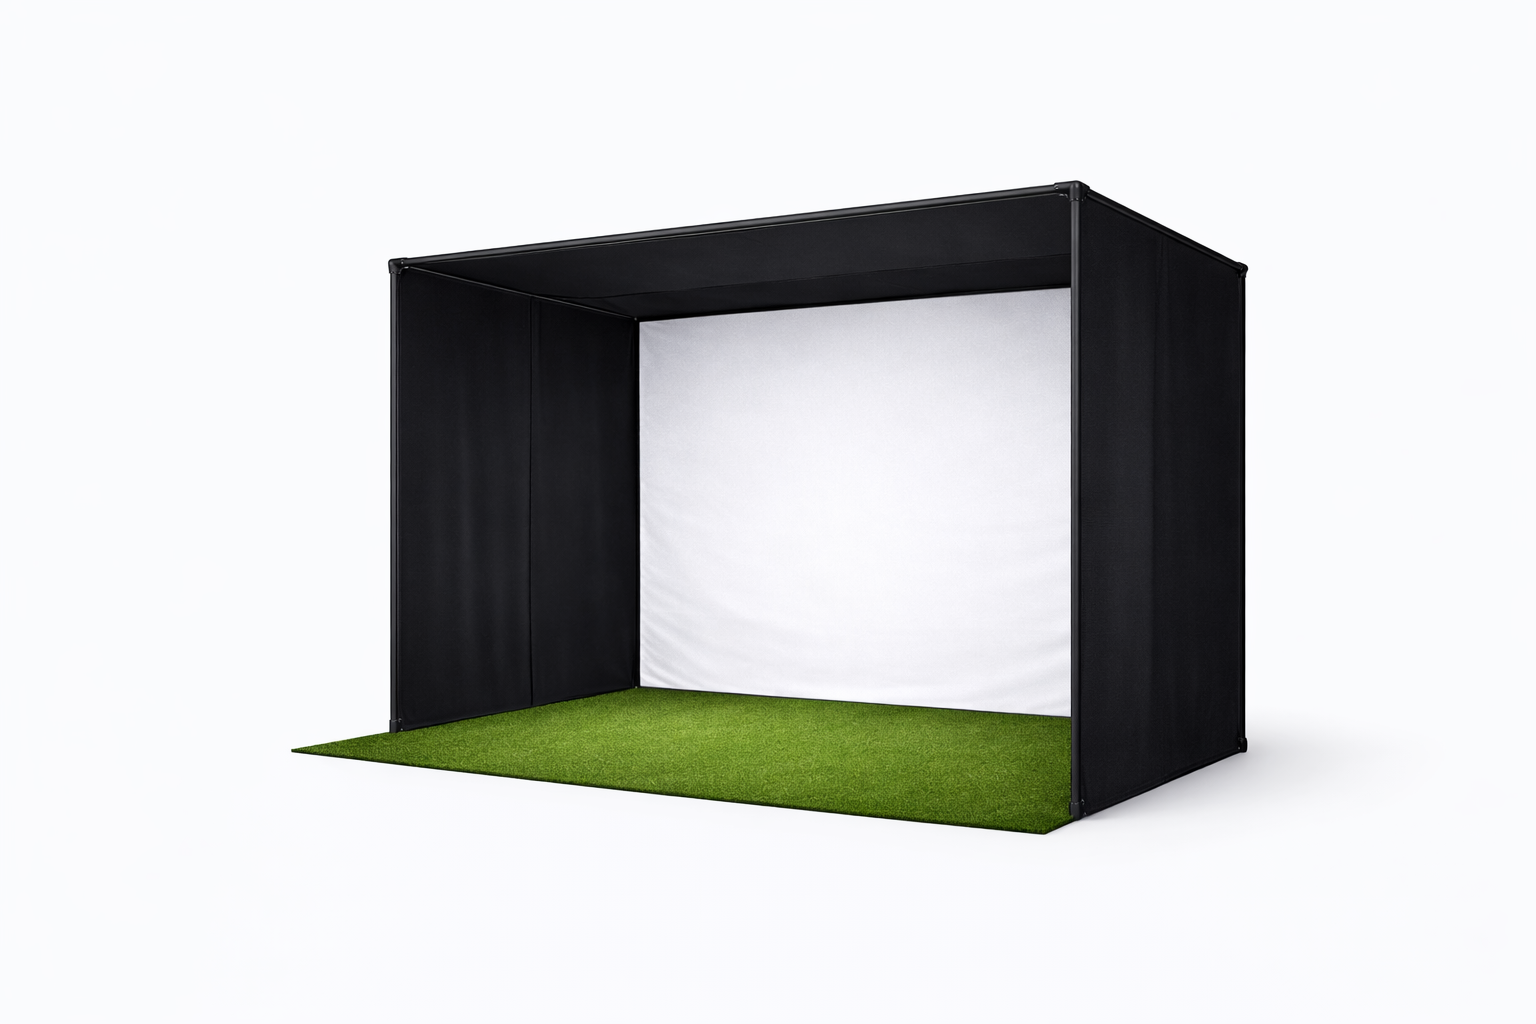
The Foundation of Your Build
The DIY Series is designed to be the foundation for your custom golf simulator, giving you a premium enclosure platform you can build around with the screen, framing, and accessory options that fit your space best.
Fully Customizable
Choose the setup that works for you. From screen upgrades to framing solutions and light-control accessories, the DIY Series gives you flexibility without sacrificing the clean, finished look serious simulator buyers want.
Optional High-Contrast Gray Screen
Upgrade to our optional High-Contrast Gray Premium Golf Screen for improved image contrast and clarity, especially in rooms with ambient lighting, creating a more immersive visual experience.
Elite Sim Golf Support
We do more than ship boxes. We help customers build complete golf simulator setups with launch monitors, projectors, enclosures, mats, and real post-purchase support.
Why the Screen Matters
In a golf simulator enclosure, the impact screen does the heavy lifting. It affects image quality, sound, durability, and how the ball reacts at impact. Cheaper entry-level screens often mean more bounceback, more noise, and a shorter lifespan.
That’s why our DIY Series 10x8 includes a premium triple-layer screen as standard. You get a better simulator experience from day one instead of needing to upgrade later.
For buyers looking for even better image performance, our optional High-Contrast Gray Premium Golf Screen helps improve image contrast and clarity, especially in rooms with ambient lighting, creating a more immersive projected image.
- Improved durability for repeated real-ball use
- Cleaner projected image surface
- Better bounceback management
- More premium overall simulator feel
- Optional high-contrast gray screen for brighter-room performance
What’s Included
- Premium triple-layer impact screen
- Black enclosure surround panels
- Attachment and tensioning components
- Hardware required for enclosure assembly
- DIY setup guidance for your frame build
Note: Frame tubing is designed around standard 1" EMT conduit, allowing you to source pipes locally and avoid oversized freight costs — or choose optional pre-cut framing solutions for an easier install path.
Optional DIY Series Upgrades
Because the DIY Series is built to be the foundation for your custom golf simulator, you can tailor the enclosure with premium add-ons that improve image quality, frame protection, and overall ease of installation.
Back Cover / Blackout Sheet Kit
Reduce rear light leakage for a darker, cleaner projection environment and improved image quality. For customers wanting the most complete setup, this is one of the best upgrades for maximizing projected image performance.
Back Cover Pipe Kit
Add the optional back cover pipe kit for a simpler install, or source the pipe yourself locally and we’ll tell you exactly what sizes you need to complete the blackout and back cover setup.
Foam Insert Kit
Foam inserts fit neatly behind the screen flaps to help protect the enclosure frame and create a more finished, better-protected hitting bay setup.
Pipe Framing Kit
Your frame still requires 1-inch EMT to complete the build. Source it locally from a hardware store, or choose our optional pre-cut pipe framing kit for tubing cut to the exact lengths required for easier assembly.
DIY Series 10x8 Enclosure Specifications
| Specification | Details |
|---|---|
| Enclosure Width | 10 ft (120") |
| Enclosure Height | 8 ft (96") |
| Approx. Enclosure Depth | 6 ft |
| Frame Style | Designed for standard 1" EMT conduit |
| Impact Screen | Premium triple-layer impact screen included standard |
| Screen Upgrade Option | Optional High-Contrast Gray Premium Golf Screen available for improved contrast and clarity in rooms with ambient lighting |
| Optional Accessories | Back Cover / Blackout Sheet Kit, Back Cover Pipe Kit, Foam Insert Kit, and Pipe Framing Kit |
| Best Use | Home golf simulator builds, garage simulators, spare room setups, DIY hitting bays, Do-It-Yourself golf enclosure projects |
Elite Sim Golf DIY Series vs Carl’s Place DIY Enclosures
If you’re comparing top DIY golf enclosure options, here’s the simplest difference: Elite Sim Golf positions the DIY Series as the foundation for your custom golf simulator, with a premium triple-layer screen included standard and customizable upgrade paths for image quality, framing, and enclosure accessories. Carl’s DIY enclosure offers a more configurable menu of options, while the DIY Series focuses on delivering a more premium starting point from day one.
| Comparison Point | Elite Sim Golf DIY Series 12x9 | Carl’s Place DIY Enclosure |
|---|---|---|
| Screen strategy | Premium triple-layer screen included standard | Multiple screen options offered, including Standard, Preferred, Premium, and High-Contrast Gray Premium |
| Entry-level screen path | No need to start with an entry screen and upgrade later | Standard screen is presented as a budget material for beginners |
| Premium screen construction | Triple-layer premium screen included with enclosure | Premium screen described as 3 layers of heavy-duty impact-resistant polyester with a noise-dampening center layer |
| Optional image upgrade | Optional High-Contrast Gray Premium Golf Screen for improved contrast and clarity in ambient light | High-Contrast Gray Premium available as a separate screen choice |
| Frame approach | Designed around standard 1" EMT conduit, with optional pre-cut pipe framing kit | Uses 1" EMT unless their add-on framing kit is selected |
| DIY / Do-It-Yourself value proposition | Premium screen-first package focused on better out-of-the-box value with customizable accessory paths | Highly configurable kit with selectable screen upgrades |
| Best fit for buyer | Buyers who want the premium screen included from the start and want a stronger foundation for a custom simulator | Buyers who want to choose between budget, mid-tier, and premium screen materials |
| Support ecosystem | Elite Sim Golf bundles, projector guidance, launch monitor pairing, and real simulator support | Strong enclosure configurator and broad product catalog |
Comparison is based on publicly visible product-page information for Carl’s DIY enclosure and screen material descriptions.
Built for Modern Simulator Setups
The DIY Series 12x9 enclosure fits naturally into today’s home simulator builds and pairs well with popular launch monitors, short-throw projectors, and premium hitting mats.
- VTrack launch monitor setups
- Uneekor systems
- Garmin R50 installations
- GSPro-based simulator builds
- Short-throw projector configurations
The Elite Sim Golf Advantage
- Premium screen included standard
- Clean black enclosure presentation
- DIY-friendly frame approach
- US-based customer support
- Easy bundle opportunities with mats, monitors, and projectors
This is the kind of product page that helps convert both DIY shoppers and premium buyers who are tired of piecing together upgrades after checkout.
Frequently Asked Questions
What makes this enclosure different from other DIY golf enclosure kits?
Can I customize the DIY Series enclosure to fit my simulator build?
Do I need to buy the frame pipes separately?
Is 12x9 a good size for a home golf simulator?
Will this work with launch monitors and simulator software?
The Foundation for Your Custom Golf Simulator
The Elite Sim Golf DIY Series 12x9 enclosure gives you the premium screen quality, cleaner look, and fully customizable upgrade path serious simulator buyers actually want. Start with a stronger foundation and build your simulator your way.
What Comes in the Box
Everything you need to build the soft-goods portion of your DIY golf simulator enclosure is included. Just add standard 1" EMT conduit sourced locally for the frame. For Do-It-Yourself golf simulator shoppers, this keeps the build practical while maintaining a premium result.

Premium Triple-Layer Impact Screen
Included standard for better durability, improved bounceback control, and a more premium simulator experience.

Black Surround Panels
Clean enclosure fabric helps frame the screen and creates a darker, more immersive hitting bay.

Attachment & Tensioning Kit
Includes the hardware and tensioning components needed to secure and stretch the screen properly.

DIY Setup Guidance
Clear guidance for assembling your enclosure with standard 1" EMT conduit sourced from your local hardware supplier.
EMT Cut List & Frame Guide
This enclosure is designed around standard 1" EMT conduit. Use the guide below as a clean starting point for planning your frame build. Final cut lengths may vary slightly depending on your fittings, assembly method, and desired screen tension. This builder-friendly design also makes it a strong option for DIY and Do-It-Yourself golf simulator enclosure shoppers looking for premium materials.
Suggested Frame Cut List
| Piece | Qty | Approx. Length | Use |
|---|---|---|---|
| Top Width Rails | 2 | 144" | Top front and top rear width span |
| Vertical Uprights | 4 | 108" | Front and rear corner uprights |
| Depth Rails | 4 | 60" | Upper and lower side depth sections |
| Lower Width Rails | 2 | 144" | Lower front and lower rear width span |
| Optional Rear Brace(s) | 1–2 | To suit build | Added frame rigidity if desired |
Frame Planning Notes
- Use standard 1" EMT conduit sourced locally for easier purchasing and replacement.
- Measure your actual fittings before final cuts, especially if using specialty corner connectors.
- Confirm ceiling height and room depth before assembling the full frame.
- Leave enough depth behind the screen for safe ball impact absorption and proper tensioning.
- Make sure the frame sits square so the screen hangs evenly and projects cleanly.
- For a cleaner finish, dry-fit the frame first before final tightening and fabric installation.